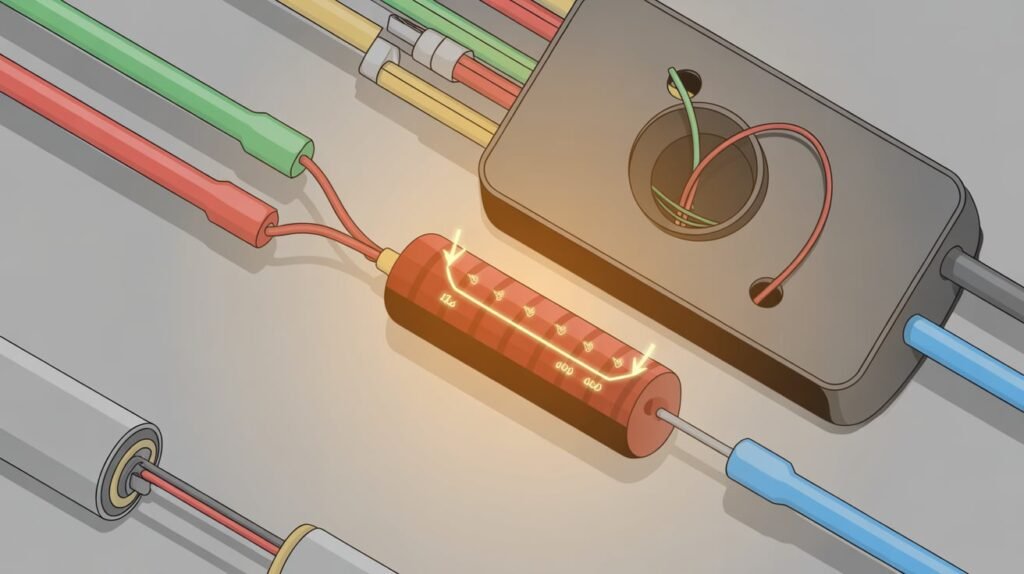
Understanding how to calculate voltage drop across a resistor helps beginners and advanced learners solve circuit problems with confidence. Many people struggle with this concept because they are unsure how resistance, current, and voltage interact inside a circuit. This guide by CalcViva’s expert technical writer explains how to calculate the voltage drop across a resistor in a simple, step-by-step way, starting with the basic principles and moving on to the detailed methods used in real electronic circuits. By learning how voltage drop works, you can troubleshoot circuits, design stable projects, and avoid problems like dim LEDs or unstable sensors. Whether you’re studying electronics or working on practical wiring, this explanation gives you the clarity needed to calculate voltage drop correctly every time.’
Table of Contents
What Is Voltage Drop and Why Does It Happen in a Resistor?
A voltage drop refers to the decrease in electrical potential as current flows through a resistor. This happens because the resistor opposes the movement of electrons, causing energy to be released as heat or light depending on the device. Every resistor in a circuit uses up some of the supplied voltage, and the amount depends on its resistance and the current passing through it. Voltage drop tells you how much energy is consumed at a specific point in a circuit. Understanding this helps you analyze how power is distributed and ensures your components receive the correct voltage to operate safely and reliably in both small and large electrical systems.
Simple explanation of voltage drop (beginner-friendly)
Think of voltage drop like water flowing through a narrow pipe. As the pipe becomes narrower, the pressure decreases because it becomes harder for the water to move forward. A resistor works the same way with electricity. It restricts the flow of electrons, and this restriction causes some of the electrical energy to convert into heat. The decrease in energy along the way is what we call voltage drop. It helps explain why different components in a circuit receive different voltages and why analyzing each resistor’s drop helps prevent issues like weak output signals or overheating. This simple idea forms the foundation for calculating voltage drop accurately.
How resistors reduce voltage in a circuit
Resistors reduce voltage by creating controlled opposition to the flow of current. As electrons move through the material of the resistor, they collide with atoms inside it, releasing energy. This energy release produces heat, and the lost electrical energy becomes measurable as voltage drop. When several resistors are connected in a circuit, each one takes a share of the available voltage depending on its value. Higher resistance means more energy is used up across that component. This predictable behavior helps designers divide voltage levels, protect sensitive parts, and stabilize circuits. By understanding how resistors consume energy, you can plan circuits that deliver the correct voltage to each component.
Relation between voltage, current, and resistance
Voltage, current, and resistance are closely connected through a simple relationship known as Ohm’s Law. Voltage can be thought of as the electrical pressure that pushes electrons through a conductor. Current is the actual movement of those electrons, and resistance is the obstruction that slows them down. When resistance increases, current decreases for a fixed voltage. When current increases through the same resistor, voltage drop increases as well. This relationship helps you predict how any circuit will behave when components are added or changed. Knowing how these three elements interact makes it easier to calculate voltage drop and understand how energy moves in electrical systems.
Ohm’s Law Explained: The Core Formula for Calculating Voltage Drop
Ohm’s Law gives a direct formula to calculate voltage drop across any resistor. It states that the voltage across a resistor equals the amount of current flowing through it multiplied by its resistance. This idea is widely used in electronics because it works consistently for nearly all resistive components, from tiny LEDs to large household appliances. Whether you have a simple circuit with one resistor or a multi-branch system, the formula helps you determine exactly how much energy each resistor uses. Understanding Ohm’s Law not only supports voltage drop calculations but also strengthens your overall ability to analyze and troubleshoot electrical circuits accurately.
The formula V = I × R and what each variable means
The formula V = I × R is the foundation of voltage drop calculations. In this equation, V stands for voltage drop measured in volts, I represents current measured in amperes, and R stands for resistance measured in ohms. The formula shows that voltage drop increases when either current or resistance increases. This makes sense because more current means more electron movement, and more resistance means more opposition inside the resistor. The formula works in every type of DC circuit and is easy to apply once you know the current and resistance values. It’s an essential tool used in classrooms, labs, and electrical installations.
Why Ohm’s Law always works for resistors
Ohm’s Law always works for resistors because their behavior stays predictable at different voltages and currents. Resistors are made from materials that have stable electrical properties, meaning they do not change their resistance when the voltage increases. This steady response makes it possible to calculate voltage drop accurately using a simple formula. Unlike some electronic parts such as diodes or transistors, resistors do not depend on temperature changes or direction of flow to determine their voltage. Their consistent behavior allows engineers to design circuits with confidence, knowing that calculations based on Ohm’s Law will remain accurate and reliable under normal operating conditions.
Units involved (volts, amps, ohms) and common mistakes to avoid
When calculating voltage drop, it’s important to use the correct units. Voltage is measured in volts (V), current is measured in amperes (A), and resistance is measured in ohms (Ω). Many errors happen when people mix different unit scales, such as milliamps instead of amps or kilo-ohms instead of ohms. For example, 10 mA is actually 0.01 A, and 2 kΩ equals 2000 Ω. Using the wrong units can lead to incorrect voltage drop results. Another mistake is forgetting to measure current across the correct branch in a circuit. Keeping units consistent and double-checking values helps ensure accurate calculations every time.
Voltage Drop Calculator: Instant, accurate results for resistors, series, parallel & wiring
Voltage Drop Calculator
Choose a mode, enter values, and click Calculate. Results include voltage drop, currents, and basic power where applicable.
Step-by-Step: How to Calculate Voltage Drop Across a Resistor

Calculating voltage drop becomes simple when you follow a clear sequence of steps. First, you need to know how much current is flowing through the resistor. Then you must confirm the resistance value either from color bands or a circuit diagram. Once you have these two pieces of information, applying Ohm’s Law gives you the exact voltage drop. This step-by-step approach ensures you don’t overlook essential details such as unit conversions or measurement accuracy. Whether you’re troubleshooting a malfunctioning circuit or designing a new one, these steps help you stay organized and produce reliable results using basic electrical principles.
Step 1: Identify current flowing through the resistor
The first step is determining the current that passes through the resistor. Current can be measured using a multimeter in series with the component, or it can be calculated if the total voltage and total resistance are known. In a series circuit, current is the same through every resistor, which makes this step easier. In a parallel circuit, each branch carries its own current, so you must calculate or measure each path separately. Identifying the correct current is essential because even a small mistake in current measurement leads to a significant error in the voltage drop. Accurate current identification sets the stage for a correct final calculation.
Step 2: Find the resistor value (R)
The second step involves locating the resistance value. This can be done by reading the color code printed on the resistor, checking the marking on the component, or referring to a schematic diagram. If the resistor has been used for a long time, its value may shift slightly due to heat or aging, so measuring it with a multimeter may provide a more accurate result. Resistance values are usually given in ohms, kilo-ohms, or mega-ohms. Converting these to base ohms helps you apply the formula properly. Knowing the correct resistor value ensures that your voltage drop calculation stays accurate and meaningful.
Step 3: Apply Ohm’s Law to get voltage drop
After identifying the current and resistance, you can calculate the voltage drop by multiplying them. The formula V = I × R gives a direct result showing how much voltage the resistor consumes. This result helps you check whether the resistor receives the intended amount of energy and whether other parts of the circuit will get the correct voltage. If the voltage drop is too high, the component might overheat or other parts may not receive enough energy. If the drop is too low, the circuit may not perform as expected. Applying Ohm’s Law completes the calculation and confirms your understanding of the circuit’s behavior.
Worked example for beginners (simple circuit)
Imagine a simple circuit with a 9-volt battery and a single resistor of 300 ohms. To find the voltage drop, you must first calculate the current. Using Ohm’s Law in reverse, I = V ÷ R = 9 ÷ 300 = 0.03 A. Now apply the voltage drop formula: V = I × R = 0.03 × 300 = 9 volts. This means the entire battery voltage appears across the resistor, which makes sense since it is the only component in the circuit. This example shows how the formulas work together and demonstrates how easy it becomes to calculate voltage drop when current and resistance are known.
How to Calculate Voltage Drop When the Current Is Unknown
Sometimes you may not know the current flowing through a resistor, especially in circuits with multiple components. In such cases, the process requires extra steps, but the principle remains the same. You first calculate the total resistance of the circuit, then use the source voltage to find the total current. Once you know the overall current, you can determine the voltage drop across any resistor using Ohm’s Law. This method is widely used in real electronics when current cannot be measured directly. Learning how to handle unknown current helps you solve more complex problems and strengthens your circuit analysis skills.
Using total resistance to find circuit current
When current is unknown, start by finding the total resistance. In a series circuit, add all resistor values together. In a parallel circuit, calculate the equivalent resistance using the proper formula. Once you have the total resistance, use the source voltage to calculate current with I = V ÷ R_total. This gives you the current flowing from the power source. In a series circuit, this value applies to every resistor equally. In parallel circuits, this value helps you find how much current goes through each branch. Knowing the total current ensures you can correctly calculate voltage drop for each resistor afterward.
Applying V = I × R for individual resistors
After determining the total current, you can calculate the voltage drop across each resistor independently. For series circuits, each resistor’s drop equals the current multiplied by its resistance. For parallel circuits, all resistors share the same voltage, but current varies. Using Ohm’s Law for each branch or resistor gives a complete picture of how energy is distributed. This step is important because voltage drop helps you understand which components consume the most power and whether any part of the circuit might overload. It also reveals how different resistor values influence the overall circuit behavior.
Real-world example using a battery and two resistors
Suppose you have a 12-volt battery connected in series with two resistors, one 100 ohms and the other 200 ohms. The total resistance is 300 ohms. The total current equals I = 12 ÷ 300 = 0.04 A. Now calculate each voltage drop: the 100-ohm resistor has V = 0.04 × 100 = 4 volts, and the 200-ohm resistor has V = 0.04 × 200 = 8 volts. Adding both drops gives 12 volts, which matches the battery voltage. This example shows how voltage divides proportionally in series circuits and confirms that your calculations align with the behavior of real electrical systems.
Voltage Drop in Series Circuits (Voltage Divider Rule)
Series circuits divide voltage across resistors based on their resistance values. This behavior forms the basis of the voltage divider rule, a common tool used to set reference voltages and control signal levels. The rule explains exactly how much voltage each resistor receives when connected in a chain. Understanding this helps you design stable circuits for sensors, LEDs, amplifiers, and more. When you calculate voltage drop using this rule, the results match real measurements, making it a reliable way to control voltage distribution. Learning how voltage divides in series circuits gives you greater flexibility when planning or troubleshooting electrical designs.
How voltage is split across series resistors
In a series circuit, all resistors share the same current, but they do not share the same voltage. Voltage splits according to resistance size. A larger resistor receives a larger share of the voltage because it offers more opposition to the flow of current. This proportional distribution means you can predict the voltage at each point without measuring it directly. When designing circuits, this helps ensure each component receives a safe and appropriate voltage. It also explains why changing a single resistor can affect the entire circuit. Understanding this division makes calculating voltage drop in series setups much easier.
Formula: Vᵣ = (Rᵢ / Rₜₒₜₐₗ) × Vₛₒᵤᵣcₑ
The voltage divider formula provides a direct way to calculate voltage drop across individual resistors in a series circuit. The formula states that the voltage across a resistor equals its resistance divided by the total series resistance, multiplied by the source voltage. This method avoids extra steps and is widely used in designing circuits that require precise voltage levels. It works well for low-power signal circuits and sensor interfaces where accuracy matters. Because the formula relies on ratios, it gives consistent results even when resistance values change significantly. With this equation, you can find voltage drop quickly without measuring current separately.
Example: Using the voltage divider method
Imagine you have a 10-volt source connected to two resistors in series, one 150 ohms and the other 350 ohms. The total resistance is 500 ohms. Using the voltage divider formula, the voltage across the 150-ohm resistor is (150 ÷ 500) × 10 = 3 volts. The 350-ohm resistor receives (350 ÷ 500) × 10 = 7 volts. Together, these drops add up to the full 10 volts supplied. This example shows how the voltage divider rule simplifies calculations and gives accurate predictions. It’s especially useful when designing circuits that need specific voltage levels for sensors or input pins.
When to use voltage divider vs. Ohm’s Law
Ohm’s Law is effective for calculating voltage drop when you already know the current through the resistor. The voltage divider rule is better when dealing with series circuits where current is not directly known and you need a quick way to determine voltage distribution. Both methods give the same result, but the voltage divider approach reduces extra steps by using resistance ratios. It’s especially helpful when designing stable reference voltages or splitting voltage for multiple components. Understanding when to apply each method helps you solve circuit problems efficiently and ensures your calculations remain accurate in different situations.
How to Calculate Voltage Drop in Parallel Circuits
Why voltage drop is the same across all parallel branches
In a parallel circuit, every branch is connected directly across the same two points, so each branch shares the same supply voltage. This means the voltage drop across every resistor in parallel will always match the source voltage, even if the resistor values are not equal. Many beginners confuse this with series circuits, where voltage divides, but parallel circuits behave very differently because current chooses separate paths. The current in each branch may vary based on the resistance, but the voltage at the start and end of each branch stays fixed. This makes parallel circuits helpful in homes and electronics because every device gets a steady voltage level.
Finding current in each branch
To find the current flowing through each branch in a parallel circuit, you first note that the voltage drop across each resistor is the same as the supply voltage. Once you know that value, you apply Ohm’s Law to each branch separately. This means using I = V ÷ R for every resistor connected in parallel. A lower-value resistor will draw a higher current, while a higher-value resistor will draw a smaller current. The total circuit current is the sum of all branch currents. This helps predict how much load a power source must supply and prevents issues like overheating or voltage sag under heavy loads.
Example calculation for parallel resistors
Suppose you have a 12-volt source connected to two resistors in parallel: one 6-ohm resistor and one 3-ohm resistor. Because the voltage drop across each branch is equal to the source, both resistors experience 12 volts. For the 6-ohm resistor, the current is I = 12 ÷ 6 = 2 amps. For the 3-ohm resistor, the current is I = 12 ÷ 3 = 4 amps. Now add both branch currents to find the total: 2 + 4 = 6 amps. This example shows how parallel circuits draw more current from the source even though each branch operates independently. It also highlights why accurate branch current calculation is important for circuit protection.
Using Power to Calculate Voltage Drop (Alternative Method)
Formula V = √(P × R)
Voltage can also be found using the power-based formula V = √(P × R). This method is helpful when you know how much power a device consumes and the resistance it uses. Power tells you how much electrical energy a device converts, while resistance controls how the device behaves in the circuit. By multiplying the power rating with the resistance and taking the square root, you get the voltage drop across that component. This formula is especially useful when current is not directly measured or when you only have wattage information from a product label or data sheet.
When this method is useful (appliance ratings, real-world devices)
Many real devices list power consumption instead of current, such as household appliances, small chargers, and lighting equipment. In these cases, you often have wattage but not resistance or current. If the device provides wattage and resistance values, you can quickly find the voltage using the power formula. This is helpful when checking compatibility of power supplies, verifying safe operation, or analyzing how much load a circuit can handle. It also works well for heaters, motors with fixed resistance values, or simple DC-powered gadgets that publish electrical specs. This approach gives a practical way to estimate voltage drop when direct measurements are not available.
Worked example using wattage and resistance
Imagine a device is rated at 24 watts and has an internal resistance of 12 ohms. To find its voltage drop, you apply V = √(P × R). Multiply the values: 24 × 12 = 288. The square root of 288 gives roughly 16.97 volts. That means the device needs about 17 volts across it to operate at its stated power rating. This method works even when current is unknown, and it helps confirm compatibility with power sources. It also gives a quick way to understand how much stress a device puts on a circuit and whether your wiring or components can support that voltage safely.
Practical Real-World Scenarios Where Voltage Drop Matters

Low-voltage circuits (LEDs, microcontrollers, sensors)
Low-voltage electronics are sensitive because even a small change in voltage can affect performance, brightness, or accuracy. LEDs may dim or fail to light if the voltage drop is too high along the wiring. Microcontrollers can reset unexpectedly if their supply voltage dips below a safe level, especially during peak current events. Sensors can produce false readings when supply levels fluctuate. That’s why keeping voltage drop within safe limits is essential. Engineers and hobbyists often calculate expected voltage loss to ensure stable operation. By choosing proper wire thickness, minimizing cable length, and avoiding unnecessary resistance, these small circuits can run smoothly and reliably.
Wiring systems and long cable runs
Voltage drop becomes noticeable in long cable runs because wires themselves have resistance. As current travels along a long wire, the resistance causes energy loss, resulting in a lower voltage at the far end. This matters in building wiring, outdoor lighting, and automotive systems where cables often stretch over long distances. Higher current devices experience even greater drops because voltage loss increases with current flow. Proper planning involves choosing thicker wires, reducing distance where possible, and calculating expected drops before installation. This helps prevent dim lights, weak motors, or unreliable equipment due to insufficient voltage reaching the connected device.
Preventing performance loss caused by excessive voltage drop
Excessive voltage drop can weaken devices and shorten their lifespan. Motors may run slower, lights may appear dull, and electronic boards may behave unpredictably. To prevent these issues, technicians check wire resistance, tighten connections, and use components that match the system’s voltage needs. Another way to reduce losses is to limit current draw by using components with suitable power ratings. Regular inspection helps identify corroded connectors, worn cables, or loose terminals that increase resistance. With these precautions, circuits remain stable and devices function reliably without experiencing stress from poor voltage conditions.
Common Errors When Calculating Voltage Drop (And How to Avoid Them)
Mixing up series vs. parallel logic
A frequent mistake is using series logic for a parallel problem or the opposite. In series circuits, voltage divides across components, while current stays the same. In parallel circuits, voltage stays the same across branches, while current divides. Mixing these concepts leads to incorrect answers and poor circuit design decisions. To avoid errors, always identify how components are connected before calculating anything. Look for shared connection points or branches that split away from the main path. A quick sketch often helps clarify whether the circuit behaves like a series chain or a parallel network. Understanding this difference is key to accurate voltage calculations.
Incorrect unit conversions
Unit mistakes can lead to completely incorrect results. For example, using milliamps instead of amps without converting will produce voltage readings far higher or lower than expected. The same happens if you mix ohms with kilo-ohms or watts with milliwatts. Before performing any calculation, check each value to confirm it’s in the correct base unit. Converting units early in the process reduces errors. A worksheet or small reference chart helps keep values organized. This approach ensures clean, accurate voltage drop results and reduces confusion while working with different device ratings or measurement tools.
Forgetting internal resistance or real-world tolerance
Real components rarely match their exact labeled values. Resistors have tolerance levels, meaning their true resistance can be slightly higher or lower. Batteries and power supplies also have internal resistance that reduces available voltage under load. Ignoring these factors can make calculations look perfect on paper but fail during actual use. Accounting for tolerance helps create more reliable designs, especially in sensitive circuits. Including internal resistance in your calculations gives a clearer view of real performance. These small adjustments help avoid surprises, especially when a circuit operates near its limits or handles higher currents.
How to Minimize Voltage Drop in Electrical Circuits
Choosing the correct resistor value
Selecting the right resistor value plays a major role in keeping voltage drop under control. Using resistors with overly high values can waste voltage and limit current to a point where connected devices perform poorly. On the other hand, using values that are too low may pull more current than the circuit can safely deliver, causing wires and components to heat up. A balanced approach is to choose a resistor that meets the load’s needs while keeping the circuit stable. Checking datasheets, recommended ranges, and power ratings helps ensure the resistor value supports reliable operation without causing avoidable voltage loss.
Reducing wiring resistance
Wiring resistance affects voltage drop just like a resistor does. Every wire has some resistance, and longer or thinner wires add more unwanted loss. To lower this resistance, you can use wires made of conductive materials such as copper and ensure they are in good condition with clean connections. Even slightly corroded terminals add resistance and reduce the voltage available at the load. Using wires with proper thickness, avoiding unnecessary bends, and keeping connections tight all help reduce overall wiring resistance. These steps ensure that more voltage reaches the intended device and protects the system from underperformance.
Increasing conductor thickness or shortening wire length
A thicker wire carries current more easily because it has lower resistance. When current flows through a thin wire, voltage drop increases, especially in high-power or long-distance circuits. By increasing the conductor size, you reduce resistance and improve voltage stability. Another effective method is shortening the cable run whenever possible. Shorter wires naturally have less resistance, so the voltage remains closer to the supply value. These adjustments are common in automotive wiring, solar systems, and LED installations where even small drops can cause visible changes. Both techniques help maintain safe operation and reduce wasted power.
Designing efficient series circuits
In series circuits, each component adds resistance and contributes to voltage drop. To keep the system efficient, you must plan the arrangement so that unnecessary loads are avoided. Limiting the number of resistors in series and ensuring each component has an appropriate rating helps maintain steady voltage levels. If too many elements are stacked, the voltage reaching the final device may be lower than required. Reviewing the total resistance and adjusting component placement can improve performance. Efficient series design prevents weak output, extends component life, and ensures each part receives acceptable voltage without pushing the circuit beyond its limits.
Tools & Calculators: When to Use a Voltage Drop Calculator vs Manual Calculation
Benefits of manual calculation (accuracy, understanding)
Manual calculation helps you understand how circuits behave and why voltage drops occur. By working through the numbers yourself, you build stronger confidence in designing circuits and spotting mistakes. You can also verify unusual results instead of relying entirely on tools that might give incorrect outputs if settings are wrong. Manual methods encourage you to think through units, values, and circuit layout, making you more accurate in real tasks. This understanding becomes valuable when troubleshooting or building custom projects where calculators might not reflect real conditions. Learning the math behind voltage drop leads to better decisions and safer electrical setups.
When online calculators are useful
Online calculators help when you want quick results without performing every step manually. They are especially helpful for long cable runs, mixed resistor networks, or wiring with specific standards that require fast checking. Many calculators include fields for wire material, temperature, allowable voltage loss, and conductor size, making them practical for installers and technicians. They save time during planning and reduce the chance of missing a step. These tools also give estimates that help choose wire sizes or resistor arrangements. While not a replacement for full understanding, they help speed up everyday tasks and give quick reference values.
What inputs calculators typically require
Most voltage drop calculators ask for basic information, such as source voltage, current, wire length, and wire gauge. Some may also require material type, ambient temperature, or acceptable voltage loss percentage. When working with resistor circuits, the calculator may request resistance values, power ratings, or circuit type. Supplying correct inputs is important because wrong values lead to misleading results. Calculators usually process these details instantly and provide the expected drop, remaining voltage, and recommended adjustments. Knowing what each field represents helps you enter accurate information and interpret the final numbers with confidence.
FAQs (PAA-style Questions for Featured Snippets)
What is the formula for voltage drop across a resistor?
The formula for voltage drop across a resistor is V = I × R. This means the voltage drop equals the current flowing through the resistor multiplied by its resistance. If either value changes, the voltage drop changes accordingly. This formula applies to both small circuits and larger systems where resistors control current flow. Understanding this equation helps you predict how much voltage appears across any resistor and ensures your components receive the right operating levels.
How do you calculate voltage drop with multiple resistors?
To calculate voltage drop across multiple resistors, first determine whether they are in series or parallel. In series, add the resistances to find total resistance, calculate current using the supply voltage, and then apply V = I × R for each resistor. In parallel, voltage is the same for all branches, so calculate branch current separately using each resistor’s value. Understanding the circuit layout ensures that each resistor’s voltage drop is calculated correctly.
How do you find voltage drop if only resistance is given?
If only resistance is available, you need either current or power to find voltage. If you know current, use V = I × R. If you know power, use V = √(P × R). Without at least one of these, the voltage drop cannot be calculated because resistance alone does not tell you how the circuit behaves. Additional information is needed to determine how much electrical energy crosses the resistor.
Does voltage drop depend on resistor orientation?
Resistor orientation does not affect voltage drop. Resistors work the same regardless of which direction current flows through them. They have no polarity, so their behavior remains consistent in any orientation. Whether you flip the resistor or place it at an angle, the voltage drop still follows Ohm’s Law and depends only on resistance and current.
Is voltage drop the same in series and parallel?
No, the behavior differs. In series circuits, voltage divides across each resistor based on its value. In parallel circuits, each branch receives the full supply voltage, so all resistors experience the same voltage drop. The difference is caused by how current flows: a single path in series, multiple paths in parallel. Understanding this helps prevent mistakes during circuit design.
Can a resistor increase voltage?
A resistor cannot increase voltage. It can only reduce voltage by limiting current or dividing voltage in combination with other resistors. Any increase in voltage must come from a power supply or an active component such as a transformer or amplifier. Resistors only drop voltage, never raise it.
Summary: Quick Breakdown of How to Calculate Voltage Drop Across a Resistor
Several formulas help you calculate voltage drop effectively. The main one is V = I × R, which works for any resistor. When current is unknown, use I = V ÷ R to find it. For power-based calculations, apply V = √(P × R). In series circuits, use the total resistance to find circuit current. In parallel circuits, remember that voltage stays the same across all branches. Keeping these formulas in mind helps you solve most voltage-related problems quickly and accurately.
Fast examples for revision
If a 2-amp current flows through a 5-ohm resistor, the voltage drop is 2 × 5 = 10 volts. In a series chain with resistors of 4 ohms and 6 ohms on a 20-volt supply, total resistance is 10 ohms, giving a 2-amp current. The first resistor drops 8 volts and the second drops 12 volts. For a device rated at 18 watts with a 9-ohm resistance, voltage is √(18 × 9) = √162 ≈ 12.7 volts. These quick examples reinforce the core ideas and help with memory.
Practical takeaways
Voltage drop affects how well a circuit performs, so understanding how to calculate it helps keep devices running smoothly. Checking wire length, resistance values, and current draw allows you to spot weak points before they cause issues. Using proper wire gauge, arranging circuits wisely, and selecting suitable resistors helps maintain strong voltage levels. Whether you work with small electronics or larger systems, these ideas help build safe, steady, and reliable circuits.